SimTrack: Pose Estimation
The objects are specified in a .yaml-file referenced in simtrack_nodes/launch/multi-rigid.launch:
 <rosparam command="load" file="$(find simtrack_nodes)/config/demo_objects.yaml"/>
 <param name="simtrack/model_path" value="$(find simtrack_nodes)/../data/object_models"/>
This configuration file contains the model file names, the absolute path is specified on the /simtrack/model_path parameter:
simtrack/model_names:
- ros_fuerte
- ros_groovy
- ros_hydro
As discussed in the modeling section, the folder, .obj-, and .mtl-files are assumed to have the same name. Take care to only include models in the configuration file that you’re actually considering in your tracking scenario since undetected models reduce performance in single-GPU configurations.
Start the tracker- and detector-nodes with:
roslaunch simtrack_nodes main.launch
You can use rqt to visualize the results. By default, the /simtrack/image topic displays the tracker result (the rendered scene) blended with the gray-scale camera image.
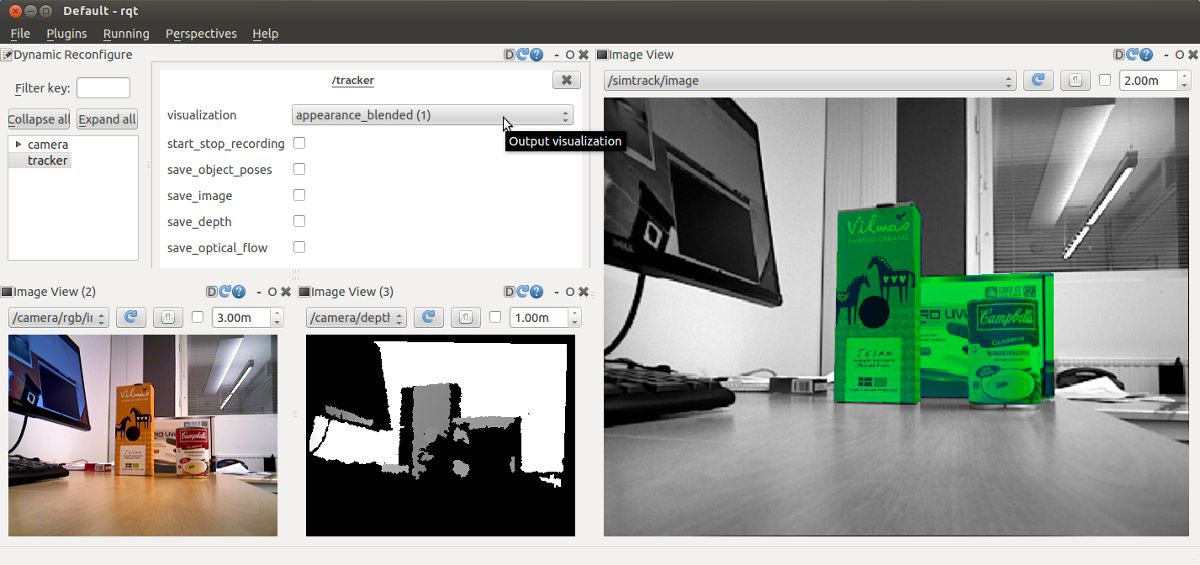
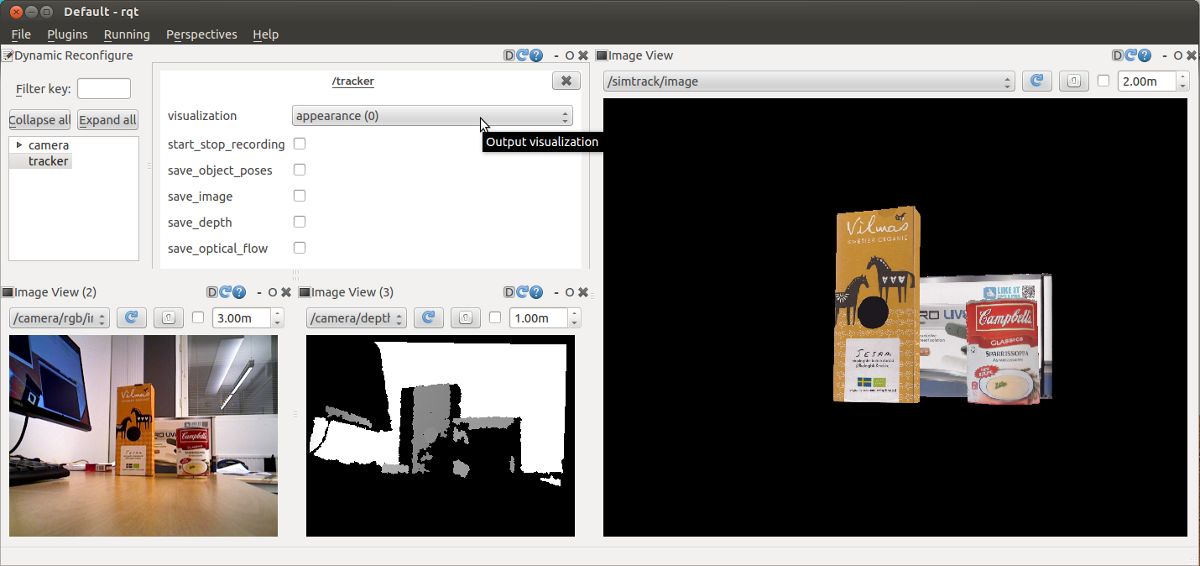
Using dynamic_reconfigure, the contents of /simtrack/image can be changed to the rendered scene (without blending):
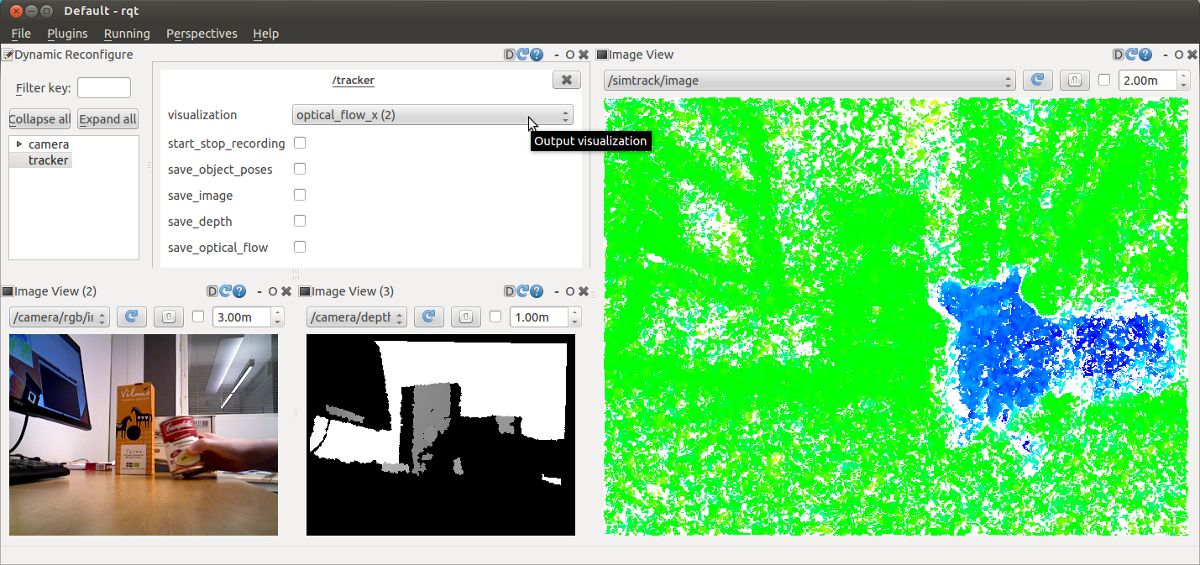
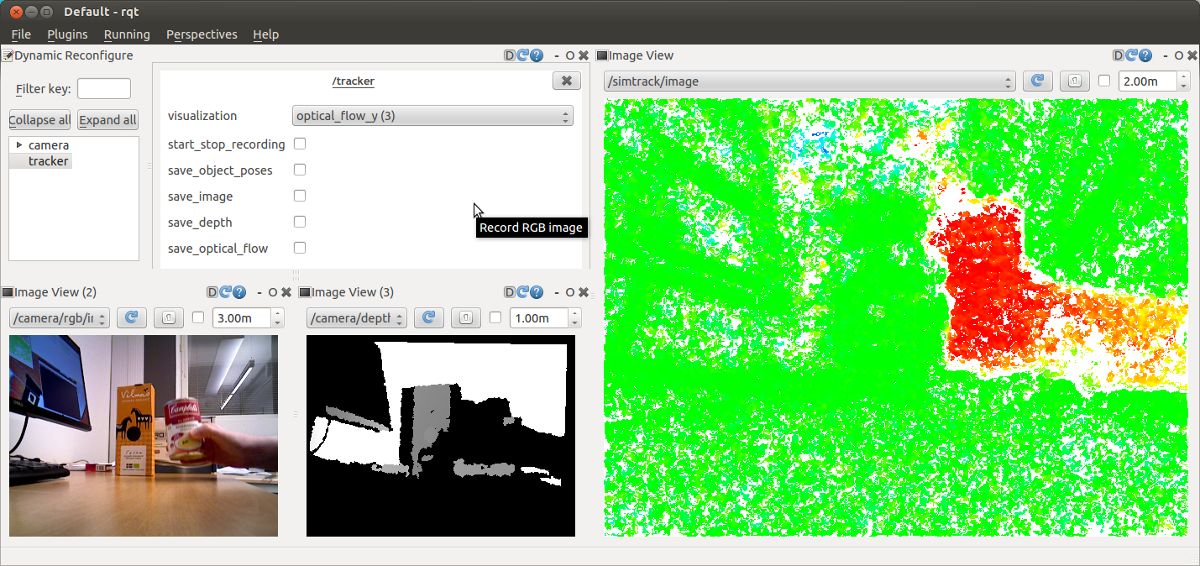
or to the horizontal and vertical components of the optical flow:
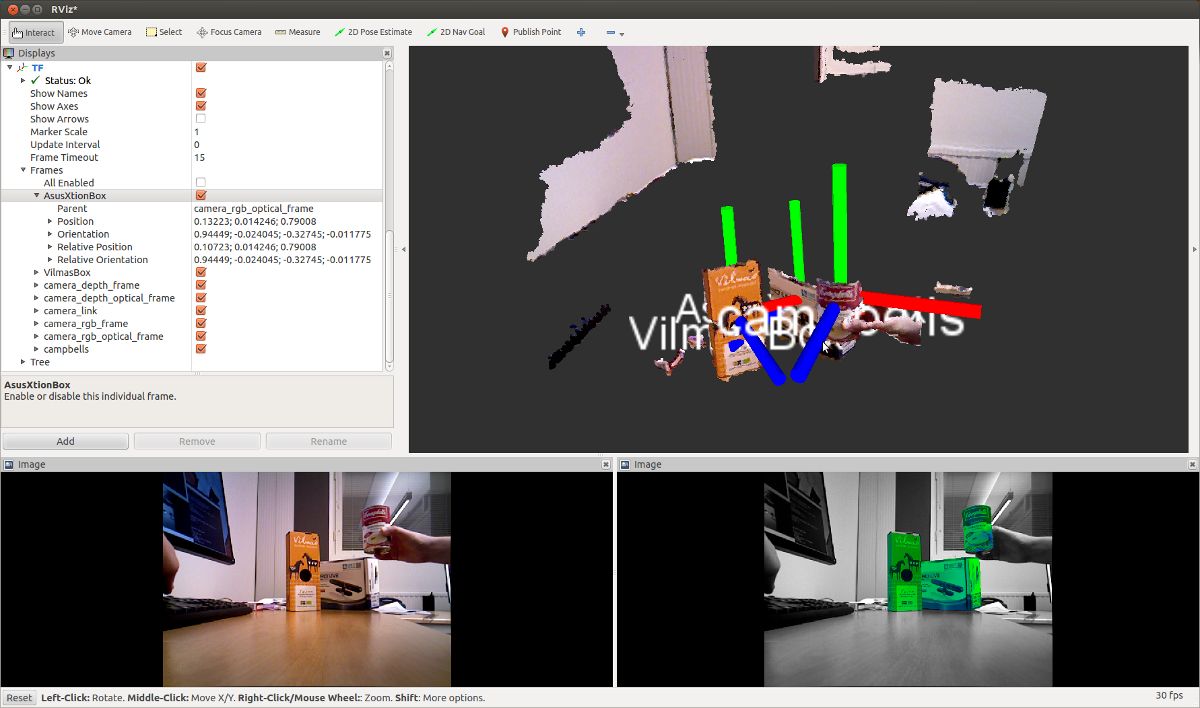
In addition, the object poses are published on tf and can be viewed in rviz:
The final part of this tutorial provides some tips to maximize SimTrack’s performance.